Introduction
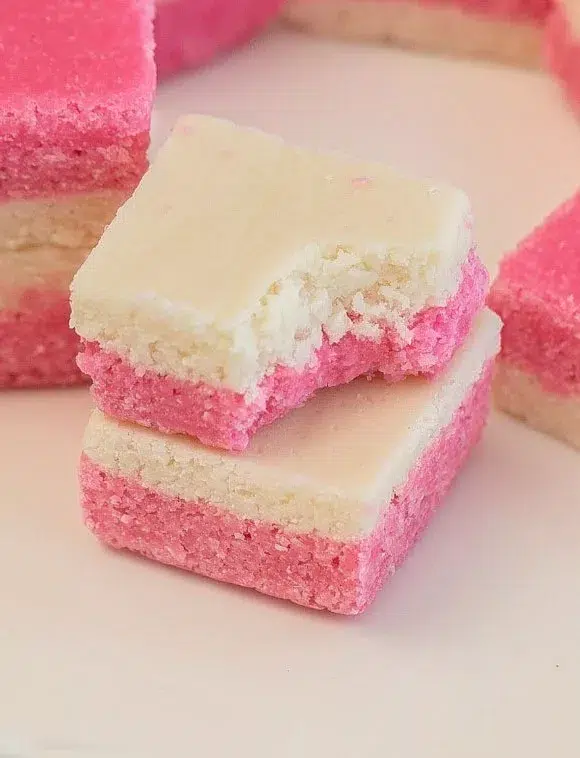
Coconut Ice is a classic South African sweet with roots in old British confectionery. The hallmark look is two layers—one snowy white, one blush pink—pressed together and cut into neat squares. The texture should be tender and fudgy rather than brittle, with the coconut’s chew balancing the creamy sweetness. Many modern home versions are “no-cook,” using condensed milk and icing sugar; others opt for a short, soft-ball syrup for a firmer bite. Either way, it’s a pantry-friendly treat that’s perfect for school fêtes, church bazaars, holiday tins, and tea-time platters.
Because Coconut Ice is rich and keeps well, small portions go a long way. It also travels beautifully and can be customised with colours, flavours, and fun toppings—making it one of the most versatile sweets for gifting and celebrations.
Tips & Techniques
- Use fine desiccated coconut: Finer shreds bind more evenly for a smooth slice; very coarse coconut can make the mix crumbly.
- Sift icing sugar: Sifting removes lumps and helps the mixture come together without over-mixing.
- Grease & line the pan: Line with parchment and leave overhang “handles” to lift the slab out cleanly for cutting.
- Mix lightly, press firmly: Stir just to combine, then press into the tin with a spatula or the back of a spoon to eliminate air pockets and get sharp layers.
- Colour gently: Gel or concentrated liquid colour avoids watering down the mixture. Start with a tiny drop—pastel is traditional.
- Chill before slicing: A 1–2 hour chill firms the slab for neat cuts. Warm a sharp knife in hot water, wipe dry, and cut straight down.
- Storage smart: Layer squares with parchment in an airtight container and keep cool and dry. Humidity makes surfaces tacky.
Delicious Variations
Flavour Twists
- Vanilla & Rose: Keep the white layer vanilla and scent the pink layer with a drop of rose water.
- Peppermint Crisp: Fold in fine shards on top of the pink layer and press lightly for a mint-choc finish.
- Lemon Zest: Add finely grated lemon zest to the white layer for a fresh, citrus lift.
- Chocolate-Dipped: Once set, dip half of each square in melted dark or milk chocolate and let set on parchment.
Colour & Texture Play
- Rainbow Bars: Divide into three bowls and tint pastel pink, yellow, and green for a retro tuck-shop look.
- Toasted Coconut: Toast a portion of the coconut for nutty depth and a speckled effect in the white layer.
- Confetti Top: Press colourful sprinkles or finely chopped glacé cherries into the surface before chilling.
Free-From & Lighter Ideas
- Dairy-Free/Vegan: Use sweetened condensed coconut milk and ensure chocolate (if dipping) is dairy-free.
- Reduced Sweetness: Cut back icing sugar slightly and add a pinch of salt to balance. Note: texture will be a touch softer.
- Naturally Coloured: Tint pink with a tiny dab of beet puree/juice or powdered freeze-dried berries.
Serving Suggestions
- Tea-Time Plate: Arrange with crunchies, Hertzoggies, and shortbread for a nostalgic spread.
- Party Favours: Wrap two or three squares in parchment and twine; add a handwritten tag.
- Dessert Garnish: Cube small and scatter over ice cream or vanilla panna cotta for coconutty crunch.
- Kids’ Treat Boxes: Tuck a square into lunchboxes for a once-in-a-while sweet surprise.
Frequently Asked Questions (FAQs)
Q1: Why is my Coconut Ice crumbly?
Usually too much dry ingredient or very coarse coconut. Add a teaspoon or two more condensed milk (or a few drops of milk) and knead gently until it holds. Press the mixture firmly into the tin.
Q2: It’s too soft and sticky—how do I fix it?
Stir in a little extra sifted icing sugar until the mixture is thick but pliable. Chill longer before cutting and store in a cool, dry spot.
Q3: Can I make Coconut Ice without condensed milk?
Yes—use a short cooked syrup (to soft-ball stage) then mix with coconut. This sets firmer and is less creamy; work quickly as it thickens fast.
Q4: How long does it keep?
In an airtight container in a cool cupboard, 1–2 weeks is typical. In very warm weather, refrigerate; return to room temperature before serving to soften the bite.
Q5: Can I freeze Coconut Ice?
Freezing can introduce condensation and stickiness on thawing, so it’s not ideal. If you must, wrap tightly in layers and thaw in the fridge (container closed), then bring to room temp before opening.
Q6: Which food colouring is best?
Gel colours give strong pigment with minimal moisture. Natural options include beet juice/powder or crushed freeze-dried berries for a soft pink.
Q7: Is Coconut Ice gluten-free?
Generally yes—check that your icing sugar and any add-ins (e.g., sprinkles, chocolate) are certified gluten-free.
Nutritional Notes & Cultural Background
Coconut Ice is a celebratory sweet—high in sugar and designed for sharing in small squares. It’s part of South Africa’s bake-sale and tea-table tradition, often sitting alongside peppermint crisp tartlets, crunchies, and koeksisters. The pink-and-white stripes cue nostalgia and festivity, making Coconut Ice as decorative as it is delicious.
In Summary
Coconut Ice Squares are charming, customisable, and wonderfully portable—an effortless way to add colour and sweetness to any occasion. Use fine coconut, press the layers firmly, chill before slicing, and store cool and dry. From holiday gift tins to school fêtes, this timeless confection is a guaranteed crowd-pleaser.
Coconut Ice Squares
Ingrédients
- 4 cups icing sugar (sifted)
- 3 cups desiccated coconut
- 1 can (385g) sweetened condensed milk
- 1 tsp vanilla essence
- 1-3 drops red or pink food colouring (optional)
Instructions
- In a large bowl, mix the sifted icing sugar and desiccated coconut until combined.
- Add the condensed milk and vanilla essence. Stir with a wooden spoon, then knead gently with clean hands until the mixture comes together like a dough.
- Divide the mixture in half. Leave one half white. Colour the other half with a few drops of red or pink food colouring and mix until evenly tinted.
- Press the white half evenly into a square or rectangular dish lined with baking paper.
- Press the pink layer on top of the white layer, smoothing it out evenly.
- Refrigerate for about 2 hours or until firm.
- Once set, cut into neat squares with a sharp knife.

